
A used FUJI NXT machine can expand SMT production capacity at a lower upfront cost—but hidden wear, missing accessories, or a configuration mismatch can quickly consume those savings. A clean enclosure and a short demonstration tell you little about how the machine will perform during a full production shift.
The real question is whether the specific equipment being offered can place your components, handle your boards, and integrate into your PCB assembly line without unexpected spending. This used FUJI NXT machine inspection checklist covers 10 things to verify before buying, with practical ways to separate reassuring sales claims from evidence you can use.
Before the inspection: define what the machine must do
Send the seller a representative production profile before arranging a demonstration. Include PCB dimensions and thickness, the smallest and largest components, package types, expected product mix, and required output. Note challenging parts such as fine-pitch devices, bottom-terminated components, tall connectors, or components supplied in trays.
Also clarify the scope of the offer. An NXT installation may involve multiple modules, placement heads, feeders, software options, and supporting equipment. “One complete machine” is not a sufficiently precise description for a purchase agreement.
Your inspection should compare an identified configuration against a defined production requirement—not simply confirm that the equipment powers on.
1. Verify the exact FUJI NXT model, generation, and configuration
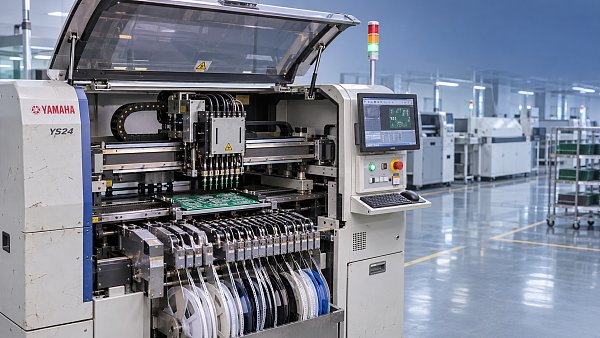
Begin with photographs of identification plates and a configuration list tied to the equipment being sold. Record the machine generation, module types, serial numbers, manufacturing information where available, and installed placement heads. Check these details against the quotation and the machine’s configuration screens.
Do not assume that all FUJI NXT generations or module combinations offer the same capabilities. Component handling, board capacity, feeder compatibility, software functions, and support requirements can differ.
- Which modules and heads are included in the quoted price?
- Does the configuration support your actual component size and height range?
- Are tray-handling equipment and other required options present?
- Have any modules, heads, or control components been replaced?
A replacement is not automatically a problem. An undocumented replacement that creates a compatibility or maintenance question deserves investigation before payment.
2. Examine maintenance history, operating records, and alarms
Ask for preventive maintenance records, service reports, calibration records, and documentation of major repairs. Where available, review operating counters and alarm history directly on the machine rather than relying only on screenshots supplied beforehand.
Operating hours need context. Equipment running a stable product with regular maintenance may be a better purchase than a lightly used machine stored poorly or repeatedly moved. Counters also need interpretation: establish what each displayed value measures and whether a controller replacement or reset affects its usefulness.
Look for recurring servo, vacuum, vision, communication, and feeder-related alarms. An isolated event may have a straightforward explanation; repeated faults without a documented corrective action are more concerning.
Ask the seller to connect each significant repair to a service record and a successful follow-up test. Missing records do not prove poor condition, but they increase uncertainty and justify a more extensive inspection.
3. Inspect mechanical condition beyond the exterior
With the machine safely stopped and access permitted, inspect the frame, module interfaces, accessible motion components, cable carriers, covers, and connection points. Look for corrosion, impact marks, damaged wiring, contaminated lubrication areas, and signs of makeshift repairs.
Have a qualified technician run the machine through appropriate motion checks. Listen for unusual vibration, grinding, or inconsistent movement during acceleration and deceleration. A machine that moves smoothly at low speed may behave differently under production conditions.
Pay particular attention to signs of placement-head collisions or transport damage. Bent brackets, damaged covers, or disturbed alignment points should prompt further checks rather than a cosmetic explanation.
Any internal inspection, adjustment, or lubrication should follow the applicable service procedures. Do not allow an informal demonstration to become an unsafe exercise in bypassing guards or touching moving assemblies.
4. Test placement heads, nozzles, and the vacuum system
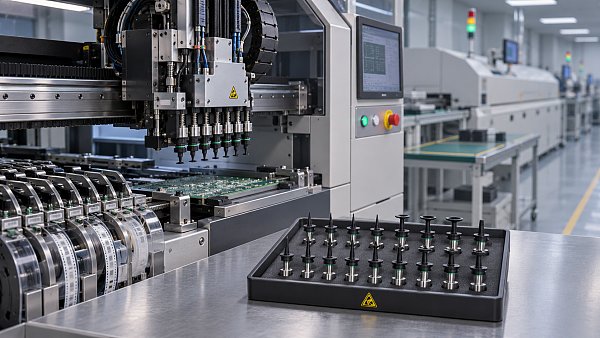
The placement head is central to both output and component handling. Confirm each installed head’s identity and suitability for the intended application. Inspect nozzle holders, nozzle-changing mechanisms where fitted, and accessible pneumatic connections for wear, contamination, or damage.
Request functional tests covering pickup, nozzle changes, component retention during movement, and placement. A vacuum system can appear satisfactory at idle yet struggle with particular components or during rapid motion.
- Check nozzles for chipped tips, blockage, and uneven wear.
- Verify that supplied nozzle types cover the planned component mix.
- Review available vacuum diagnostics and related error logs.
- Identify missing nozzle stations, holders, or accessories.
Repeated pickup failures should not be dismissed as “just a nozzle issue” without testing that explanation. The cause could involve the nozzle, feeder presentation, component data, vacuum leakage, or head condition—and repair costs differ considerably.
5. Validate vision performance and placement quality
A convincing demonstration uses representative components and boards, not only large parts that are easy to recognize and place. Ask the seller to demonstrate fiducial recognition, component recognition, and placement across the working area.
Check camera images and illumination for clarity and consistency. Repeated recognition retries, frequent manual adjustments, or unexplained component rejection deserve attention. Confirm that relevant calibration procedures have been completed and that supporting records are available.
For placement verification, agree on a suitable test method and measurable acceptance criteria before the trial. Evaluate component position and rotation using appropriate measurement equipment; visual inspection alone is insufficient for demanding packages.
Do not use a soldered board as the only proof of placement accuracy. Reflow can move components and obscure the machine’s original placement condition. Assess placement before reflow where practical, then use downstream inspection to evaluate the wider assembly process.
6. Check feeder condition, compatibility, and included quantities
Feeders can represent a substantial portion of the usable package, yet listings sometimes describe them only as “included.” Request an inventory showing feeder types, tape widths, quantities, identification details where available, and condition.
Confirm compatibility with the exact NXT configuration and relevant software environment. Do not assume that a feeder is suitable simply because it is described as a FUJI feeder.
Test representative units from each included type, especially those needed for small components or frequently used tape widths. Observe indexing consistency, pickup position, cover-tape handling, locking, and communication. Ideally, place components from these feeders during the production trial.
Inspect storage racks, feeder carts, setup equipment, and power or communication accessories if they form part of the offer. A large feeder count has limited value when many units need repair or do not match your production requirements.
7. Run a sustained production trial—not just a startup demonstration
Powering on proves that the machine starts. It does not prove that it can maintain useful output. Request a sustained run long enough to expose intermittent errors, using a job that reasonably reflects your component mix and placement demands.
During the trial, record:
- Boards completed and actual cycle time.
- Pickup errors, recognition rejects, and dropped components.
- Machine stops and the reasons for each stop.
- Operator interventions, including repeated manual recovery.
- Placement inspection results from the trial boards.
Separate machine-related losses from material, programming, and upstream supply problems. All affect observed output, but they do not indicate the same equipment fault.
Published placement rates are not a reliable forecast for your job. Board handling, component distribution, feeder arrangement, head configuration, and recognition requirements influence achievable throughput. Base your buying decision on demonstrated performance under clearly recorded conditions.
8. Confirm PCB handling and complete line compatibility
A capable placement machine can still be a poor line fit. Verify the supported PCB size, thickness, weight, clearance, and transport direction for the offered configuration. Test conveyor width adjustment, board detection, clamping, and transfer using a representative board or panel.
Review board support arrangements carefully, particularly for thin panels and double-sided assemblies. Confirm that the necessary support tooling is included and that underside components will not conflict with it.
Then check the interfaces with the upstream printer or conveyor and downstream equipment. Confirm conveyor height, transfer spacing, communication or handshake requirements, and any necessary interface hardware.
Compare the placement trial’s cycle time with the rest of the line. Buying additional placement capacity will not necessarily increase finished-board output if printing, reflow, inspection, or material replenishment remains the limiting step.
9. Verify software access, backups, and serviceability
A mechanically sound machine can become difficult to operate if essential software access is missing. Ask the seller to demonstrate normal startup, program loading, job editing, data backup, and restoration procedures where practical.
Identify installed software versions, licensed options, required computers, hardware keys if applicable, and any restrictions affecting transfer or continued use. Confirm the legal transferability and ongoing availability of required software rather than assuming that an installed application is sufficient.
Request a documented backup package covering available machine parameters, calibration data, programs, and other recovery information relevant to the configuration.
Also investigate parts and technical support for the exact generation. Establish realistic sourcing routes for head repairs, cameras, control electronics, feeders, and other critical assemblies. Availability, revision compatibility, repair lead time, and documentation matter as much as the purchase price of an individual spare part.
10. Put acceptance conditions, accessories, and delivery responsibilities in writing
The final check concerns what you will actually receive—and what happens if it differs from the demonstration. Attach the configuration list, accessory inventory, known defects, and agreed test results to the purchase documentation.
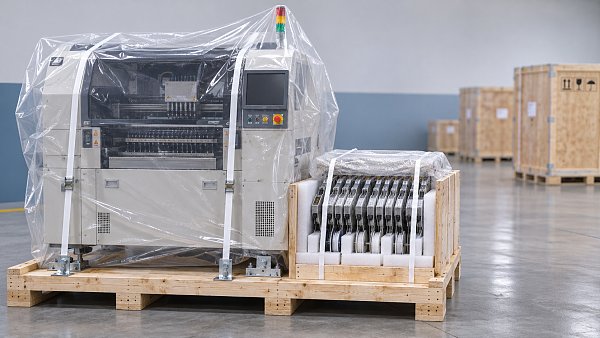
Define who handles deinstallation, transport preparation, packing, loading, insurance, unloading, installation, and recommissioning. Moving placement equipment requires appropriate procedures and transport protection; a successful factory trial does not eliminate shipping risk.
Clarify any warranty or service terms in writing, including exclusions, response arrangements, and responsibility for replacement parts and labor. If acceptance will occur after delivery, specify the test conditions and the process for resolving discrepancies.
Finally, calculate the cost to reach production readiness: equipment, freight, installation, missing feeders, nozzles, tooling, software, training, and foreseeable repairs. That figure is more useful than the advertised machine price.
Turn the inspection into a buying decision
After the inspection, divide findings into three groups: acceptable condition, defined corrective work, and unresolved risk. A worn accessory with an agreed replacement cost is different from an intermittent placement fault with no confirmed cause.
Delay commitment when the seller cannot identify the configuration, demonstrate representative placement, or explain recurring faults. If an on-site visit is impractical, use an independent technician or a live remote inspection supported by serial-number records, test data, and uninterrupted trial footage.
For buyers working with SMT MALLS on SMT/THT equipment, original machine spare parts, or a complete PCB assembly line solution, this checklist provides a practical basis for discussing configuration and production readiness. The goal is not simply to buy a used FUJI NXT machine that runs. It is to buy an identified, testable configuration whose condition, accessories, and support requirements make sense for your factory.



GET A FREE QUOTE
Simply fill in the information to get a free quote! Our professional team customizes photovoltaic solutions for you, provides accurate quotes, and rejects hidden consumption!