
Blog
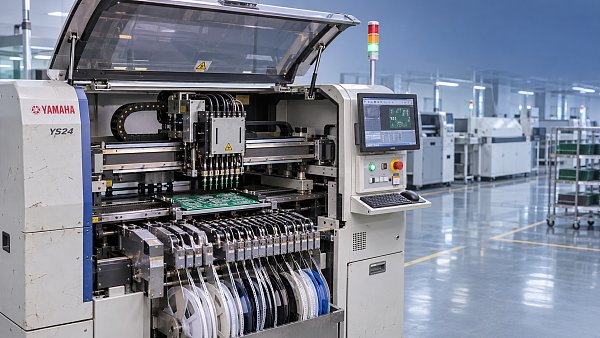
FUJI NXT feeder problems can disrupt SMT production, cause component misfeeds, and increase downtime. Early diagnosis and consistent maintenance help keep assembly lines running smoothly.
This guide covers typical faults, practical troubleshooting, and maintenance routines to help operators improve feeder reliability and make informed spare parts decisions.
Start by separating a feeder fault from a tape, component, setup, or machine issue. Replacing parts before checking these causes can waste time and money.
Common FUJI NXT Feeder Problems at a Glance
A feeder may appear responsible when components are missing, misplaced, damaged, or repeatedly rejected. The symptoms provide clues, but they rarely identify the cause alone.
For example, missing components can result from poor tape presentation, empty pockets, incorrect pickup coordinates, or a vacuum nozzle that cannot grip the component.
Repeated errors at one feeder position deserve attention, but the feeder itself is only one part of the system. Check the material, setup, and machine conditions together.
Common symptoms include irregular tape advance, cover tape take-up problems, pickup errors, component damage, feeder recognition faults, and intermittent operation after installation.
Record the feeder identification, machine position, material lot, component type, and alarm details before making changes. This information makes recurring patterns easier to detect.
How to Troubleshoot a Feeder Before Replacing Parts
Begin with the machine alarm and production history. Note whether the problem started after a reel change, feeder replacement, program update, or maintenance activity.
Stop the affected operation using your site's approved procedure. Follow machine safety instructions and isolate energy where required before removing, inspecting, or servicing equipment.
Check that the correct feeder is assigned to the component and installed in the intended position. Confirm the setup against the production program and work instructions.
Inspect the reel and tape path for incorrect threading, twists, damage, or excessive resistance. Verify that the cover tape separates and collects as intended.
Look for empty pockets, displaced components, damaged sprocket holes, or inconsistent tape dimensions. A new reel from the same lot may help reveal a material issue.
With appropriate authorization, run the machine's available feeder or pickup checks according to the applicable FUJI documentation. Observe whether the fault occurs consistently or intermittently.
If the setup permits, test the suspect feeder in a known-good position and compare it with a known-good feeder using compatible material and settings.
Change one variable at a time and record the result. If the fault follows the feeder, inspect it further; if it stays at the position, investigate the machine interface.
When the fault follows a material reel or component lot instead, involve the material supplier or internal quality team before adjusting otherwise stable equipment.
Why Is the Tape Not Advancing Correctly?
Irregular tape advance can leave a component outside the pickup position or prevent the next pocket from presenting correctly. The machine may report repeated pickup failures.
First, inspect tape loading and confirm that the sprocket engages the tape holes correctly. Check for debris, torn holes, bent tape, and obstructions along the path.
Verify that the feeder is compatible with the tape width, pocket pitch, and packaging used. Requirements vary by feeder model, so consult the applicable documentation.
Check whether the reel rotates freely and whether its mounting creates excessive drag. Resistance upstream can disturb tape movement even when the feeder mechanism is functional.
Inspect accessible drive components for contamination, damage, or unusual wear. Do not force the mechanism or adjust internal settings without the correct service procedure.
If the fault continues with correctly loaded, compatible material, remove the feeder from production and send it for qualified inspection. Record the observed behavior and test results.
What Causes Cover Tape and Take-Up Problems?
Cover tape that peels inconsistently can expose components too early, leave pockets covered, or interfere with pickup. Incorrect threading is a useful first check.
Follow the loading path specified for the feeder and verify that the cover tape is secured correctly in the take-up mechanism before restarting production.
Look for accumulated tape, adhesive residue, damage, or a take-up path that restricts movement. Clean only accessible areas using materials approved for that feeder.
Peel behavior can also vary between packaging lots. Compare the affected reel with known-good material and document differences before changing feeder settings or replacing hardware.
If the cover tape tears repeatedly or the take-up mechanism slips after correct loading, stop using the feeder and arrange inspection by trained maintenance personnel.
How to Investigate Pickup Errors and Missing Components
A pickup error does not automatically mean the feeder is defective. The component must be presented correctly, picked by the nozzle, and confirmed by the machine.
Check the feeder first for stable presentation and consistent pocket position. Then inspect the component packaging for empty pockets, loose parts, or contamination.
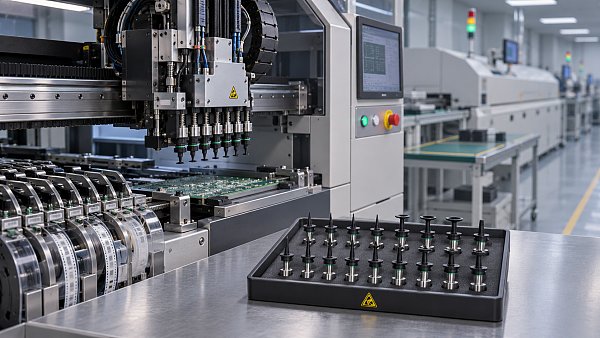
Inspect the nozzle for blockage, wear, damage, and correct selection. Follow the machine manufacturer's procedures when checking vacuum performance and replacing nozzle components.
Review component data and pickup settings against the approved production program. Unauthorized offsets may hide an underlying mechanical problem while creating placement or quality risks.
Compare the same component on a known-good feeder where practical. Also check whether the error appears across different feeder positions or only at one location.
If multiple feeders show similar pickup problems, investigate shared causes such as nozzle condition, vacuum supply, component data, or machine setup before purchasing feeder parts.
Why Are Components Being Damaged or Placed Incorrectly?
Chipped, inverted, or displaced components can originate in the reel, the feeder, the pickup process, or downstream placement. Preserve samples and trace the affected lot.
Inspect pockets before and after presentation when the machine is safely stopped. Look for trapped debris, malformed pockets, damaged cover tape, and components sitting incorrectly.
Confirm that the feeder and tape dimensions match, and that material moves without snagging. Avoid using a feeder that visibly damages tape during normal operation.
Check nozzle suitability, component orientation data, and machine settings under your quality procedures. A feeder change alone will not correct a programming or handling problem.
When defects appear after a particular reel change, quarantine the suspect material as required and compare it with a previously accepted lot before resuming production.
What If the Machine Does Not Recognize the Feeder?
Recognition or communication faults may involve incorrect seating, contamination, damaged interfaces, an incompatible feeder, or a problem at the machine position. Start with the alarm details.
Using the approved shutdown and handling procedure, remove and reinstall the feeder. Confirm that it locks into position without forcing it or damaging the interface.
Inspect accessible contacts and mating surfaces for visible contamination or damage. Use only manufacturer-approved cleaning methods and never apply liquid directly to an energized interface.
Compare the feeder and machine position with known-good equivalents, provided your maintenance procedure allows it. This helps distinguish a feeder issue from a position-specific fault.
Verify feeder compatibility with the machine configuration and software using official documentation or qualified support. Similar-looking units are not necessarily interchangeable across every setup.
If a fault persists, document the alarm, feeder identification, machine configuration, and comparison results. These details help a service provider diagnose the issue efficiently.
FUJI NXT Feeder Maintenance Checklist
Maintenance intervals should reflect production hours, component packaging, environmental conditions, and the applicable FUJI instructions. A heavily used feeder may need attention more often.
Before each production run, check feeder identification, installation, tape loading, cover tape routing, and visible damage. Confirm that the correct material and program are in use.
During operation, monitor recurring pickup errors, abnormal tape movement, unusual noise, and take-up behavior. Escalate repeated faults instead of repeatedly clearing alarms without investigation.
At scheduled maintenance, remove loose debris from accessible areas using approved tools. Inspect tape guides, engagement surfaces, and interfaces for contamination, damage, and abnormal wear.
Do not use compressed air, solvents, or lubricants unless the applicable manufacturer instructions permit them. Incorrect cleaning can move debris inward or damage sensitive components.
Where the maintenance procedure requires functional testing, use the specified equipment and acceptance criteria. Record the results rather than relying only on visual appearance.
After service, reinstall the feeder and run an approved verification using suitable material. Confirm stable feeding and acceptable pickup performance before returning it to production.
Keep a history for each feeder, including cleaning, faults, repairs, replaced parts, test results, and time out of service. Use that history to refine maintenance schedules.
When Should You Repair or Replace a Feeder?
Repair is often worth evaluating when the fault is isolated, compatible parts are available, and a qualified technician can restore performance within an acceptable timeframe.
Replacement may be the better operational choice when damage is extensive, faults recur after verified repairs, or downtime costs exceed the practical value of further service.
Compare the total cost of each option: parts, labor, testing, shipping, expected turnaround, and production disruption. Include the availability of a tested spare feeder.
A feeder with repeated intermittent faults deserves particular scrutiny. Even when each stoppage is short, recurring errors can consume operator time and affect production consistency.
Do not judge a repair solely by whether the alarm disappears. Require a documented functional check and monitor performance after the feeder returns to the line.
How to Choose FUJI NXT Feeder Spare Parts
Identify the exact feeder model, part number, and machine configuration before ordering. Confirm revisions and compatibility with the supplier and applicable documentation for your equipment.
Ask whether a part is original, aftermarket, new, or refurbished. Request clear information about condition, traceability, warranty terms, and any functional testing performed.
For frequently used feeders, stock critical spares according to failure history and supplier lead time. Avoid buying large quantities before confirming compatibility and actual demand.
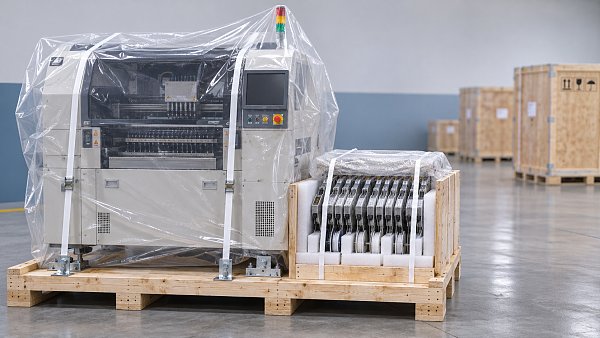
Keep replacement parts protected from contamination and physical damage. Label inventory clearly so technicians can match each item to the correct feeder and maintenance record.
SMT MALLS supports SMT and THT assembly operations with equipment, original machine spare parts, and complete PCB assembly line solutions. Provide equipment details when requesting availability.
Build a Maintenance Process That Reduces Downtime
The most effective response to FUJI NXT feeder problems is a consistent diagnostic process: document the symptom, check material and setup, then isolate the faulty element.
Combine trained operators, scheduled inspections, verified repairs, and reliable spare parts with feeder-level records. This approach supports faster decisions without treating every pickup error as a feeder failure.



GET A FREE QUOTE
Simply fill in the information to get a free quote! Our professional team customizes photovoltaic solutions for you, provides accurate quotes, and rejects hidden consumption!